Welcome to our guide on Jellycat washing instructions! Jellycat toys are beloved for their softness and quality‚ but proper care is essential to maintain their condition․
This guide will walk you through various methods‚ including machine washing‚ hand washing‚ and spot cleaning‚ to keep your Jellycat toys clean and safe․
By following these steps‚ you can ensure your Jellycat remains soft‚ vibrant‚ and durable for years to come․ Let’s dive into the best practices for caring for your Jellycat!
1․1 Overview of Jellycat Products
Jellycat is renowned for creating soft‚ adorable‚ and high-quality plush toys‚ books‚ and gifts․ Since 1999‚ the brand has become a favorite for its irresistibly cuddly designs‚ appealing to both children and adults․
Each Jellycat product is crafted with premium materials‚ ensuring durability and comfort․ From stuffed animals to personalized gifts‚ Jellycat’s collections are designed to bring joy and warmth․
Their toys are made with soft fabrics and gentle fills‚ making them perfect for snuggling․ With a wide range of characters and designs‚ Jellycat offers something for everyone‚ making their products truly special and timeless․
1․2 Importance of Proper Washing
Proper washing is crucial to maintain the quality and softness of Jellycat toys․ Improper techniques can lead to damage‚ such as fraying‚ fading‚ or loss of shape․
Regular cleaning prevents dirt buildup‚ which can degrade fabrics over time․ Following Jellycat’s care guidelines ensures your toys remain safe for children and retain their charm․
By avoiding harsh chemicals and high heat‚ you preserve the texture and color of the materials․ Proper washing also removes allergens and germs‚ keeping the toys hygienic․ Investing time in correct care extends the life of your Jellycat‚ ensuring it stays a cherished companion for years․

General Care Tips for Jellycat Toys
Always use gentle care for Jellycat toys․ Machine wash in a laundry bag on a cold‚ gentle cycle‚ or hand wash with mild detergent and cool water․
Avoid submerging or using harsh chemicals․ Store toys in a clean‚ dry place and clean regularly to maintain their softness and quality․
2․1 Understanding Care Labels
Understanding care labels is crucial for maintaining your Jellycat toys․ The sew-in label provides specific instructions‚ such as hand washing or machine washing at 30 degrees․
Some toys may require surface washing with mild soap and cool water‚ while others can be tumble dried on low heat․ Always check the label first to ensure safe cleaning․
Ignoring these guidelines may damage the toy or void warranties․ By following the care labels‚ you can extend the life of your Jellycat and keep it looking its best․ This ensures your toy remains soft and vibrant for years․
2․2 Recommended Washing Methods
For Jellycat toys‚ recommended washing methods vary based on the toy’s material and care label instructions․
Machine washing is suitable for many Jellycat toys‚ using a gentle cycle with cold water and placing the toy in a pillowcase or laundry bag for protection․
Hand washing is ideal for delicate toys‚ using mild detergent and cool water‚ avoiding submersion․ Spot cleaning with a damp cloth and soap is perfect for minor stains․
Always prioritize gentle cycles and avoid harsh chemicals to maintain softness and texture․ Following these methods ensures your Jellycat toy remains clean and in great condition․
2․3 Materials to Avoid
When washing Jellycat toys‚ it’s crucial to avoid certain materials that could damage their softness and texture․
Harsh detergents‚ bleach‚ and fabric softeners should be avoided‚ as they can strip the toys of their natural fibers․
Never use hot water or high heat settings‚ as this can cause shrinkage or discoloration․
Avoid submerging toys in water unless specified on the care label‚ and refrain from using rough scrubbers or abrasive cleaners․
Steer clear of ironing or dry cleaning‚ as these methods can permanently damage the fabric․
By avoiding these materials and methods‚ you’ll help preserve the quality and longevity of your Jellycat toy․
Machine Washing Jellycat Toys
For machine washing Jellycat toys‚ place them in a pillowcase or laundry bag to protect them during the cycle․
Use a gentle wash cycle with cold water and mild detergent to prevent damage;
Avoid submerging toys unless specified on the care label․
This method ensures your Jellycat toy remains soft and intact after washing․
3․1 Preparation for Machine Washing
Before machine washing your Jellycat toy‚ ensure it is suitable for machine washing by checking the care label․
Place the toy in a pillowcase or laundry bag to protect it from snagging or damage during the cycle․
Remove any loose dirt or dust using a soft-bristled brush or lint roller․
Avoid overcrowding the washing machine‚ as this can cause unnecessary wear․
If the toy has embellishments or delicate fabrics‚ hand washing may be preferable․
Always use a mild detergent and cold water to preserve the toy’s softness and color․
3․2 Using a Gentle Cycle
Select a gentle wash cycle on your washing machine to clean your Jellycat toy․
Use cold water to prevent shrinking or fading of colors․
Add a mild detergent‚ avoiding harsh chemicals that could damage the fabric․
Place the toy in a pillowcase or laundry bag for added protection․
Avoid using high heat or aggressive settings‚ as they can harm the soft materials․
Once the cycle is complete‚ gently shake the toy to restore its shape․
Do not leave it in the machine for extended periods‚ as this can cause unnecessary stress to the fabric․
3․3 Drying After Machine Washing
After machine washing‚ remove your Jellycat toy from the washing machine promptly․
Reshape it gently to restore its original form․
Do not place it in a tumble dryer‚ as high heat can damage the fabric․
Instead‚ allow it to air dry by laying it flat on a clean‚ dry surface․
Avoid direct sunlight‚ as it may cause fading․
For quicker drying‚ you can use a cool fan or a well-ventilated area․
Do not iron or apply heat‚ as this can harm the materials․
Let it dry naturally to preserve its softness and texture․
Hand Washing Jellycat Toys
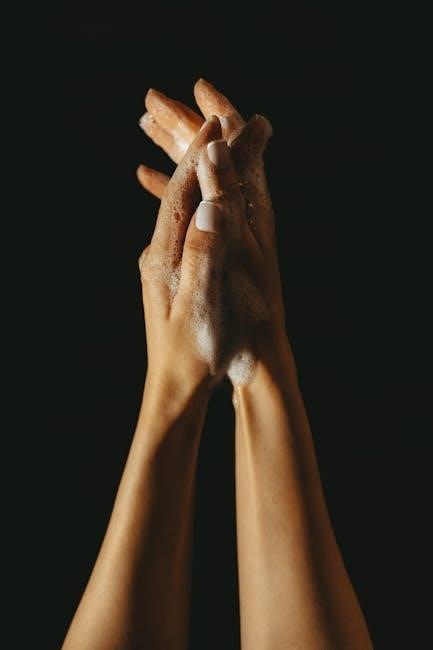
Submerge the toy in cool water‚ then gently squeeze out excess moisture․
Use a mild detergent to clean stains or dirt․
Rinse thoroughly and reshape while damp․
Air dry away from direct heat to preserve softness and quality․
4․1 Surface Washing Techniques
Surface washing is ideal for minor stains or dirt on Jellycat toys․
Dampen a soft cloth with cool water and a small amount of mild detergent․
Gently massage the affected area‚ working from the outside in․
Avoid scrubbing too vigorously to prevent fabric damage․
For tougher spots‚ let the detergent sit for a few minutes before rinsing․
Use a clean‚ damp cloth to remove soap residue․
Never submerge the toy in water‚ as this can damage the stuffing or fabric․
This method preserves the toy’s softness and appearance effectively․
4․2 Mild Detergents and Cool Water
When hand washing your Jellycat toy‚ use mild detergents to prevent damage․
Opt for baby soap or gentle fabric cleaners‚ avoiding harsh chemicals․
Cool water is essential to protect the fabric and colors․
Submerge the toy‚ gently agitate the water‚ then squeeze out excess moisture․
Avoid soaking the toy for extended periods to maintain its shape․
Rinse thoroughly with clean water to remove all soap residue․
Pat dry with a towel and allow to air dry completely․
This approach ensures your Jellycat remains soft and vibrant․
4․3 Rinsing and Air Drying
After washing‚ rinse your Jellycat toy thoroughly with cool water to remove all soap residue․
Gently squeeze out excess water without wringing or twisting․
Lay the toy flat on a clean towel‚ reshaping it to its original form․
Allow it to air dry in a well-ventilated area‚ away from direct sunlight or heaters․
Do not tumble dry or expose to high heat‚ as this can damage the fabric․
Air drying ensures the toy retains its softness and texture;
This method is gentle and effective for maintaining the quality of your Jellycat․
Spot Cleaning Jellycat Toys
Spot cleaning is ideal for minor stains or dirt on Jellycat toys․ Use a damp cloth with mild soap‚ gently blotting the area․ Avoid submerging the toy and air dry thoroughly․ This method preserves softness and prevents damage․ Always check for care labels before cleaning․
5․1 Identifying Stains or Dirt
Before cleaning‚ inspect your Jellycat toy for visible stains or dirt buildup․ Check areas like paws‚ noses‚ and creases where grime often accumulates․ Look for discoloration or odors that indicate deeper dirt․ Gently run your fingers over the fabric to detect any rough spots or embedded particles․ Identifying these areas ensures targeted cleaning‚ preventing unnecessary stress on the toy․ For tougher stains‚ pre-treatment may be needed‚ while light dirt can be addressed with a damp cloth․ Always prioritize gentle methods to maintain the toy’s softness and integrity․ Regular spot checks can prevent dirt from becoming stubborn․
5․2 Using a Damp Cloth and Soap
For spot cleaning‚ dampen a clean cloth with cool water and mild soap‚ such as baby soap or a gentle detergent․ Gently massage the soap into the stained area‚ working from the outside in to avoid spreading the dirt․ Avoid submerging the toy in water or using excessive moisture․ Once cleaned‚ use a clean‚ damp cloth to remove any soap residue․ Do not rub vigorously‚ as this could damage the fabric․ Allow the toy to air dry‚ ensuring no moisture remains․ This method preserves the softness and texture of Jellycat toys while effectively removing stains․
5․3 Avoiding Submersion
Submerging Jellycat toys in water can damage their stuffing‚ causing them to lose shape or become lumpy․ To avoid this‚ never soak the toy completely․ Instead‚ focus on cleaning only the affected areas․ Use a damp cloth to gently blot stains or dirt‚ ensuring minimal moisture exposure․ If the toy gets wet‚ pat it dry with a clean towel and allow it to air dry naturally․ Avoid squeezing or twisting‚ as this can push water deeper into the fabric․ Following these steps helps maintain the toy’s integrity and prevents damage from excessive moisture․

Special Care Instructions
Never tumble dry‚ iron‚ or dry clean Jellycat toys․ To preserve softness and texture‚ avoid harsh chemicals and high heat․ Always air dry and store properly․
6․1 Tumble Dry Restrictions
Jellycat toys should never be tumble dried‚ as high heat can damage the soft fabrics and stuffing․ Instead‚ air drying is recommended to preserve their texture and quality․
After washing‚ gently reshape the toy and allow it to air dry away from direct sunlight or heat sources․ Some users report success with low-heat tumble drying for a few minutes‚ but this is not advised․
Always follow the care label instructions‚ and if unsure‚ opt for air drying to ensure your Jellycat toy remains soft and intact․ Proper drying ensures longevity and maintains the toy’s original appearance․
6․2 No Ironing or Dry Cleaning
Jellycat toys should not be ironed or dry cleaned to protect their soft fabrics and stuffing․ Ironing can damage the materials‚ causing them to lose shape or texture․
Similarly‚ dry cleaning chemicals can harm the toy’s softness and safety․ Instead‚ air drying and gentle spot cleaning are recommended to maintain quality and ensure safety for children․ Always follow care labels for best results․
6․3 Preserving Softness and Texture
To preserve the softness and texture of Jellycat toys‚ avoid using harsh chemicals or high heat․ Gently hand wash with mild soap and cool water‚ then air dry․
This prevents fibers from breaking down and keeps the toy plush․ For machine washing‚ use a gentle cycle and a laundry bag to protect the fabric․
Regular brushing with a soft-bristled brush can also help maintain the toy’s texture․ Avoid submerging or wringing‚ as this can damage the stuffing or fabric․ Proper care ensures your Jellycat stays soft and cuddly for years․
Common Mistakes to Avoid
Avoid using harsh chemicals‚ high heat‚ or overloading the washing machine when caring for Jellycat toys․ These practices can damage materials‚ cause shrinkage‚ or reduce softness․
7․1 Using Harsh Chemicals
Using harsh chemicals on Jellycat toys can damage their soft fabrics and harm the materials․ Avoid bleach‚ strong detergents‚ or abrasive cleaners‚ as they may cause discoloration or texture loss․
Instead‚ opt for mild detergents or baby-friendly soaps to clean your Jellycat toys gently․ This ensures the toys remain soft and safe for continued use․ Always prioritize gentle cleaning products to maintain the quality and longevity of your Jellycat collection․
7․2 High Heat Settings
Using high heat settings when washing or drying Jellycat toys can cause irreversible damage․ Heat can melt adhesives‚ shrink fabrics‚ or distort the soft texture of the toys․
Always use cold water for washing and avoid tumble drying․ If drying is necessary‚ use a low heat setting or air dry․ High heat can also fade colors or weaken stitching‚ reducing the toy’s lifespan․
To preserve the quality and appearance of your Jellycat‚ stick to gentle cleaning methods and avoid exposure to excessive heat․ This ensures your Jellycat remains soft‚ vibrant‚ and intact for years of enjoyment․
7․3 Overloading the Washing Machine
Overloading the washing machine can damage Jellycat toys by causing stretching‚ tearing‚ or friction against other items․
This can lead to loss of shape‚ worn seams‚ or snagged fabrics․ To prevent this‚ place each Jellycat toy in a separate laundry bag or pillowcase before washing․
Washing one toy at a time is ideal to ensure gentle movement and minimal stress on the materials․ Avoid mixing Jellycat toys with heavy or bulky items‚ as this can cause unnecessary wear․ Always check the care label for specific instructions to ensure the best results for your Jellycat toy․
Maintaining Jellycat Toy Quality
Regularly brushing and fluffing your Jellycat toy helps preserve its softness and texture․ Store it in a dry‚ clean environment to prevent dust buildup․
Gentle handling and avoiding harsh chemicals ensure long-lasting quality․ By following these simple steps‚ you can keep your Jellycat toy looking and feeling its best․
8․1 Brushing and Fluffing
Regular brushing and fluffing are key to maintaining your Jellycat toy’s softness and appearance․ Use a soft-bristled brush to gently fluff the fur‚ especially after washing․
This helps restore the texture and prevents matting․ For toys with longer fur‚ brush in the direction of the fibers to keep them looking vibrant․ After brushing‚
gently shake the toy to remove any loose hairs․ This simple routine ensures your Jellycat stays plush and cuddly; For best results‚ brush your toy regularly
and avoid using harsh tools that might damage the fabric․ A lint roller can also help remove loose fibers and keep your Jellycat looking its best․
8․2 Storage Tips
Proper storage is crucial to maintain the quality of your Jellycat toy․ Store it in a cool‚ dry place away from direct sunlight to prevent fading․
Avoid exposing it to moisture‚ as this can lead to mold or mildew․ Use a breathable container or bag to store the toy‚ ensuring airflow․
If the toy has loops or attachments‚ consider hanging it to maintain its shape․ Do not store it in a sealed plastic bag‚ as this can trap moisture․
For long-term storage‚ place the toy in a clean‚ dry environment with acid-free tissue paper to preserve its freshness․ Proper storage helps extend the life of your Jellycat toy․
8․3 Regular Cleaning Schedules
Regular cleaning is essential to maintain the quality and appearance of Jellycat toys․ Establish a schedule based on usage‚ such as monthly spot cleaning or deep cleaning every few months․
For high-use toys‚ consider cleaning every 1-2 months to prevent dirt buildup․ Always check the care label for specific instructions․
Use a soft-bristled brush to remove loose lint or debris before cleaning․ For machine-washable toys‚ opt for a gentle cycle with cold water․
Hand-wash or spot clean as needed‚ using mild detergents and cool water․ Regular cleaning prevents stains from setting in and keeps the toy soft and vibrant․
Proper care ensures Jellycat toys remain soft‚ vibrant‚ and durable․ Follow care labels‚ use gentle methods‚ and avoid harsh chemicals to extend their lifespan and keep them adorable․
9․1 Summary of Best Practices
Always check the care label for specific instructions․ For machine washing‚ use a gentle cycle with cold water and a pillowcase or laundry bag to protect the toy․
Hand washing with mild detergent and cool water is ideal for delicate items․ Avoid submerging toys unnecessarily and never use harsh chemicals or high heat․
Spot cleaning with a damp cloth and mild soap is effective for minor stains․ Air drying is recommended to preserve softness and texture․
Following these practices ensures your Jellycat toys remain clean‚ vibrant‚ and cuddly for years to come․ Proper care maintains their quality and keeps them safe for enjoyment․
9․2 Extending the Life of Jellycat Toys
To extend the life of Jellycat toys‚ adopt a gentle care routine․ Regularly brush their fur to prevent matting and maintain softness․ Store them in a clean‚ dry place away from direct sunlight to avoid fading․
Avoid exposing toys to harsh chemicals or high heat‚ as this can damage materials․ For machine-washable toys‚ use a pillowcase or laundry bag for protection․ Air drying is crucial to preserve texture and prevent shrinkage․
By following these care tips‚ you can ensure your Jellycat toys remain vibrant‚ soft‚ and intact for years‚ providing lasting joy to both children and collectors alike․ Regular maintenance is key to their longevity․